There’s something magical about that moment when you flip the switch and your home transforms into a winter wonderland. But here’s the thing—creating that picture-perfect holiday display doesn’t have to drain your wallet or require a professional installation team. With the right approach and quality materials from ShawTech Lighting, you can craft a stunning Christmas light display that’ll make your neighbors stop and stare.
Let me tell you why DIY LED Christmas lighting has become such a game-changer for homeowners everywhere.
Why Choose LED Over Traditional Christmas Lights?
Remember those old incandescent bulbs that used to heat up your entire house? LED Christmas lights have revolutionized holiday decorating in ways that go far beyond just energy savings.
LEDs consume up to 80% less energy than traditional bulbs, so you can keep your lights on all season without watching your electricity bill skyrocket. They last roughly 25 times longer than incandescent bulbs, eliminating those mid-December replacement headaches.
The real magic happens with color consistency and brightness control. LEDs maintain their brilliance throughout their entire lifespan, giving you that crisp, vibrant glow that photographs beautifully.
Planning Your DIY Christmas Light Display
Here’s where most people make their first mistake: they start hanging lights without a plan. Start by walking around your house during daylight hours. Take photos from different angles, especially from across the street where most people will see your display.
Measure everything twice. Count your windows, measure your roofline, and don’t forget those tricky corners where you’ll need extra length for connections.
Consider your power sources too. You’ll need outdoor-rated outlets, and extension cords should be weatherproof and properly rated for your total wattage.
Essential Tools and Materials For Success
The beauty of modern DIY lighting kits is that they’ve simplified what used to be a complex process. You don’t need a degree in electrical engineering anymore—just the right components and a bit of patience.
Quality matters here more than you might think. Cheap lights fail faster, fade quicker, and often cause more headaches than they’re worth. That’s why investing in proper DIY permanent Christmas lights kits makes sense from both a cost and convenience standpoint.
For permanent installations, consider systems that include proper mounting channels. These kits with channels protect your lights from weather damage and make future maintenance much easier. The initial investment pays off when you’re not replacing damaged sections every year.
If you’re starting with a temporary setup, DIY kits without permanent channels offer flexibility while still providing professional-quality results.
Installation Techniques That Actually Work
Safety first—always. Use a sturdy ladder, have someone spot you, and avoid working in wet or windy conditions. It sounds obvious, but emergency rooms see a spike in ladder-related injuries every December.
Start from your power source and work outward. This prevents you from running out of cord length halfway through your project. Mark your connection points with temporary tape before you start installing—it’ll save you from those “how did I end up with extra lights?” moments.
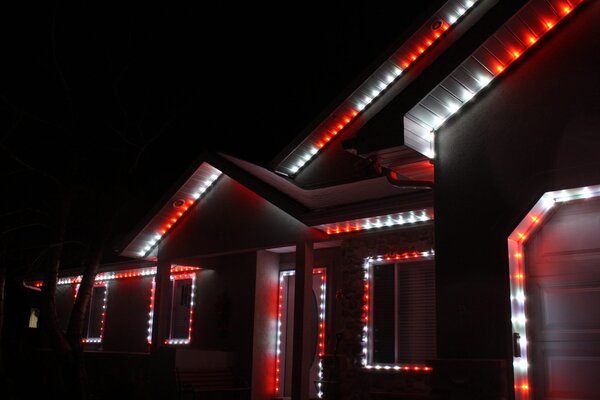
For rooflines, clips designed specifically for your roof type make all the difference. Gutter clips work great for most homes, but shingle clips might be better for certain roof styles. The goal is secure attachment without damage to your home.
When wrapping trees or posts, the spiral technique creates the most even light distribution. Start at the bottom and work your way up, maintaining consistent spacing between each wrap. For trees, aim for about 100 lights per foot of tree height—it sounds like a lot, but trust the math.
Advanced DIY Lighting Effects and Controllers
Once you’ve mastered basic installation, you might want to explore programmable effects. Modern LED controllers can create animations, sync to music, or change colors throughout the evening.
Indoor LED controller kits allow you to manage complex displays from the comfort of your living room. Imagine adjusting your entire display’s brightness or switching between different lighting patterns without stepping outside.
Color-changing capabilities add another dimension to your display. You can match your team colors for game day, go patriotic for Independence Day, or create custom color schemes that reflect your personal style throughout the holidays.
Budget-Smart Planning and Cost Savings
Permanent LED installations actually save money over time. While the upfront cost might seem higher than basic temporary lights, you eliminate annual replacement costs and significantly reduce energy bills.
Calculate your total cost of ownership over five years. Factor in replacement bulbs, higher electricity usage, and your time spent on annual installation. Permanent LED systems often break even by year three, then provide pure savings afterward.
Consider starting with one section of your home and expanding each year to spread out your investment.
Troubleshooting Common Installation Challenges
Every DIY project has its hiccups. The most common issue? Sections that don’t light up properly. Check your connections first—loose connections cause 90% of lighting problems.
Weather can affect LED performance, but good-quality lights handle temperature variations much better than cheap alternatives. If you’re experiencing flickering, it’s usually a power supply issue rather than the lights themselves.
Making Your Display Last Season After Season
Proper storage extends the life of your investment significantly. Wrap lights loosely around cardboard or specialized storage reels—tight wrapping can damage wires over time.
Label everything before storage. Trust me, next December you won’t remember which strand went where, and that “obvious” labeling system won’t seem so obvious anymore.
Consider leaving permanent mounting hardware in place year-round. Quality clips and channels are designed to withstand weather, and they’ll make next year’s installation much faster.
Your DIY LED Christmas light display should bring joy, not stress. With proper planning, quality materials, and these proven techniques, you’ll create a holiday tradition that gets better every year. The initial effort pays dividends in years of hassle-free holiday magic that truly makes your home the brightest spot on the block.